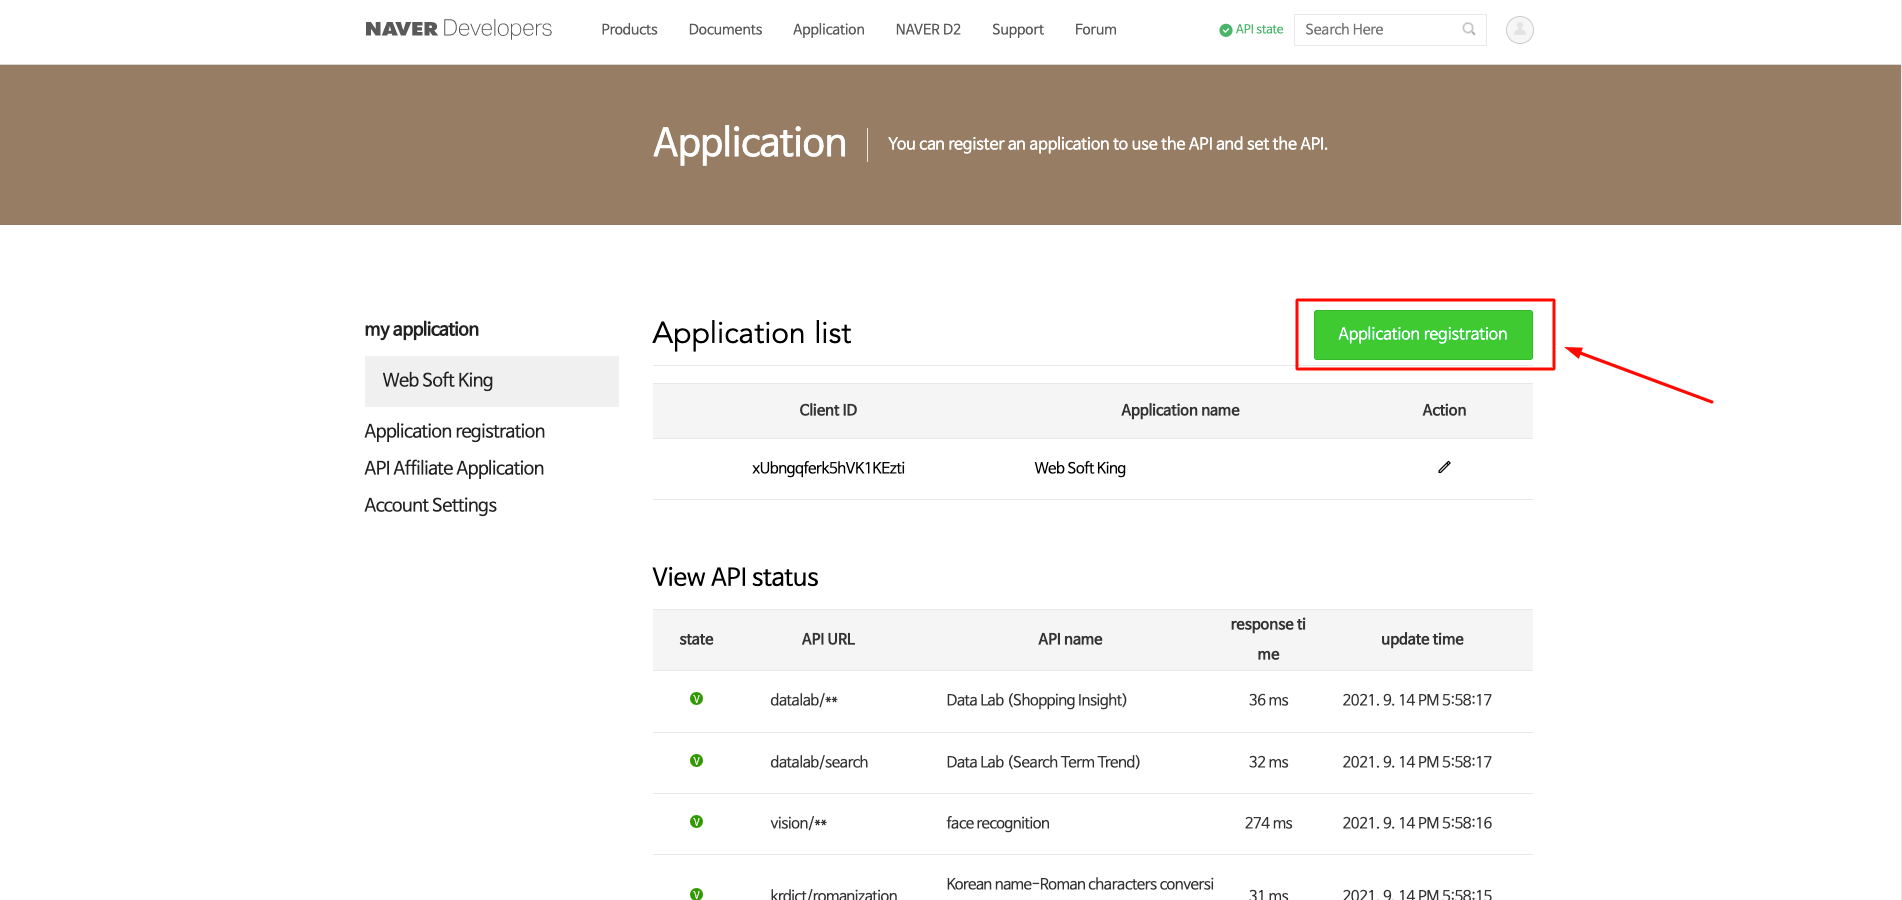
Go to the Naver Application Console and click the Application Registration button.
Naver Login Setup Guide
Learn how to enable Naver Login in the Dream Social Login app.
📋
Before You Begin
You need a Naver Developers account. If you don't have one yet, sign up at the Naver Application Console first.
Overview
Naver Login allows Korean customers to sign in quickly with their Naver account. All required information (Client ID, Client Secret, Callback URL) is issued at the Naver Developers Center and entered into the app.
Enter Naver Credentials
In the Dream Social Login app, go to Settings → API Keys → Naver and enter the following:
- Client ID — Client ID issued from Naver Developers Center
- Client Secret — Client Secret issued from Naver Developers Center
- Authorized redirect URIs —
https://shopidreamapps.com/naver/auth
The Callback URL must exactly match
https://shopidreamapps.com/naver/auth.Naver Developers Center Setup Steps
1
2
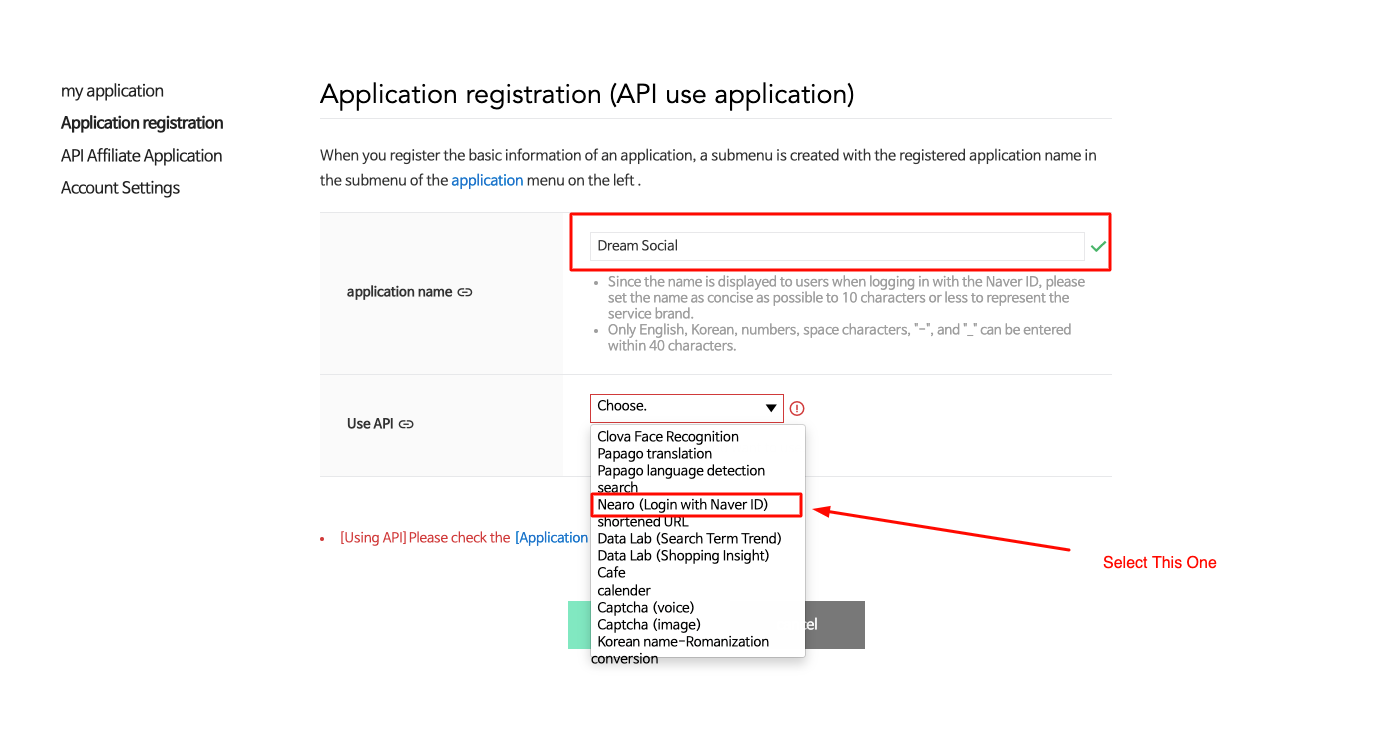
Fill in the application creation form.
- Application Name: Enter your desired name
- Use API: Select "Login with Naver ID"
3
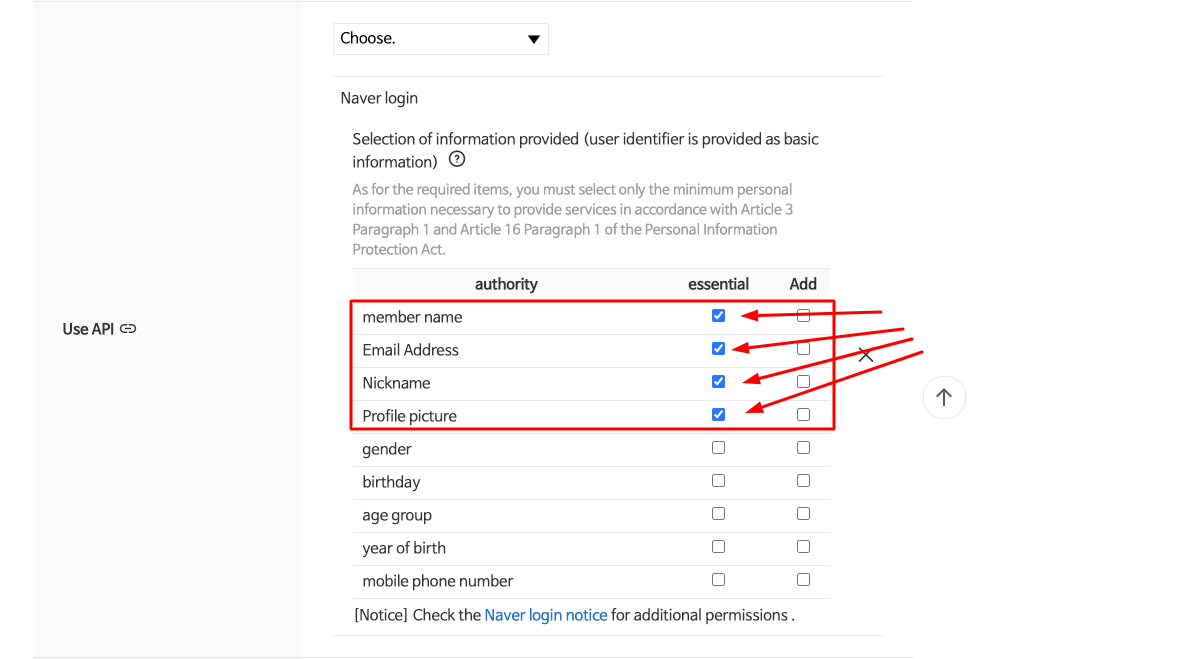
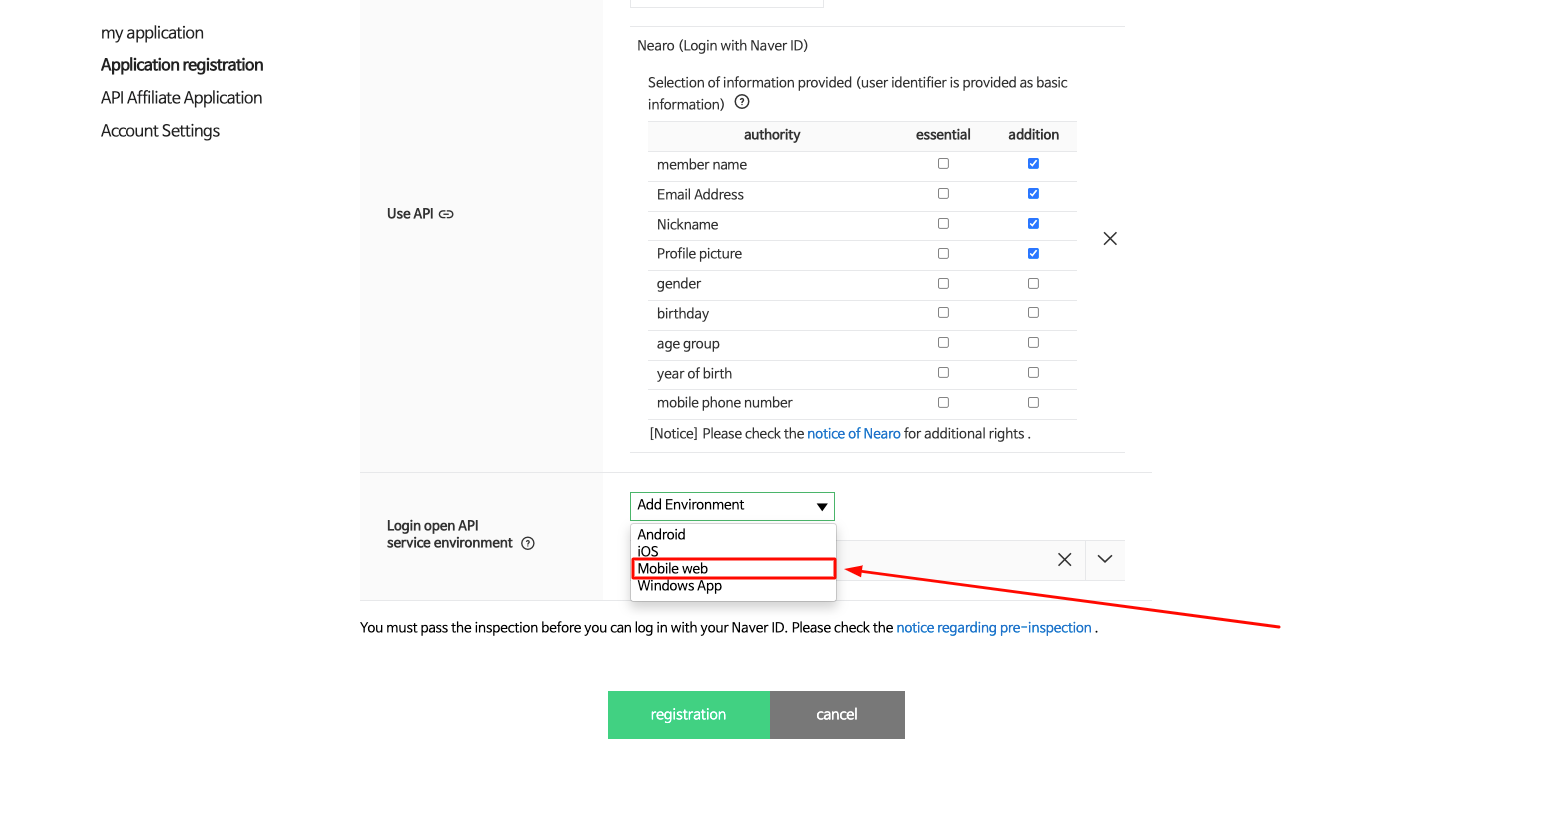
Select the 4 required items under Use API.
- Required: Member name, Email address, Nickname, Profile picture
- Other items (gender, birthday, etc.) are not used by Dream Social Login.
4
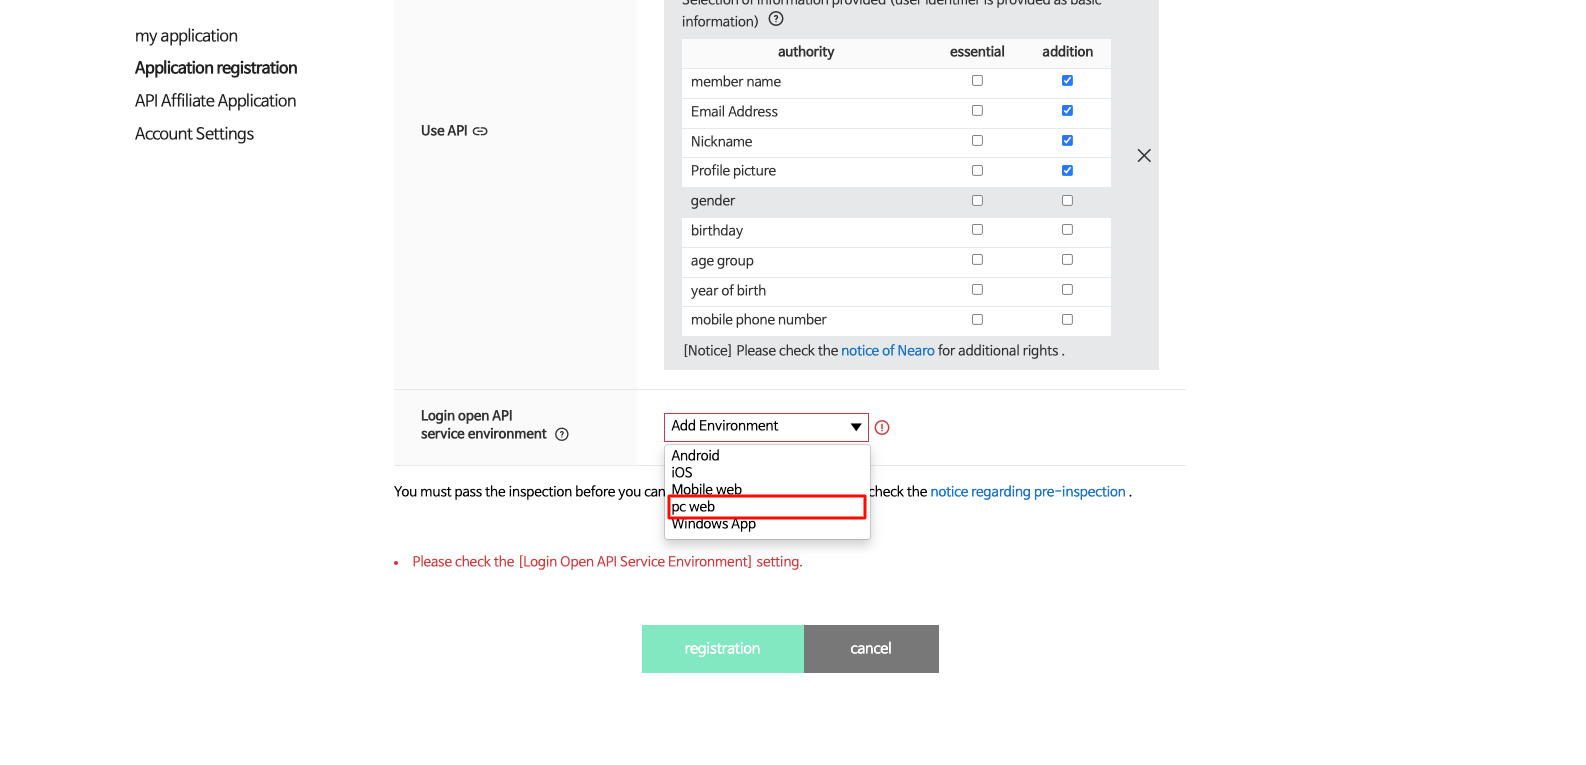
In the Login Open API Service Environment section, select PC Web.
5
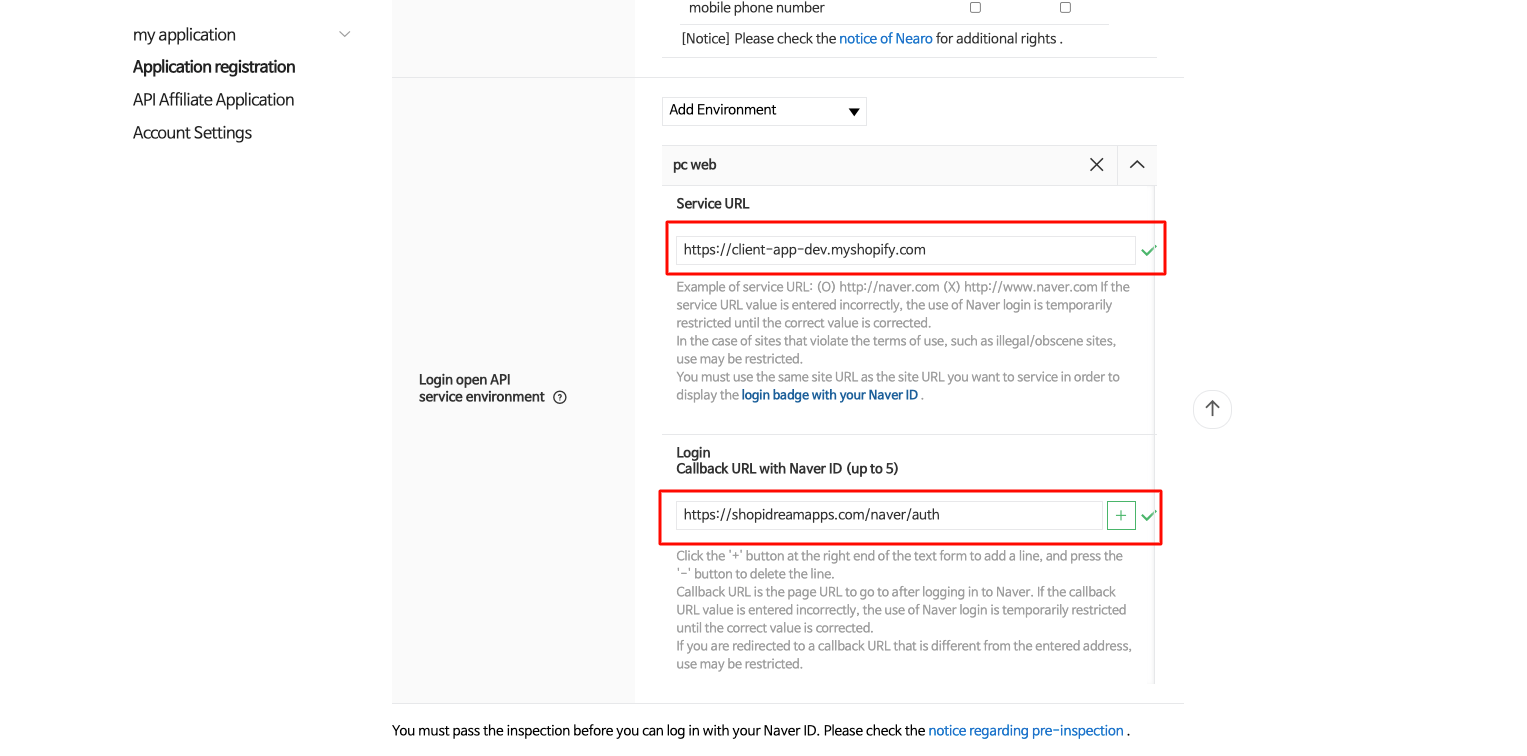
Configure the PC Web settings.
- Service URL: Your store URL
e.g. https://yourstore.com - Login Callback URL:
https://shopidreamapps.com/naver/auth
6
Add the Mobile Web environment from the dropdown.
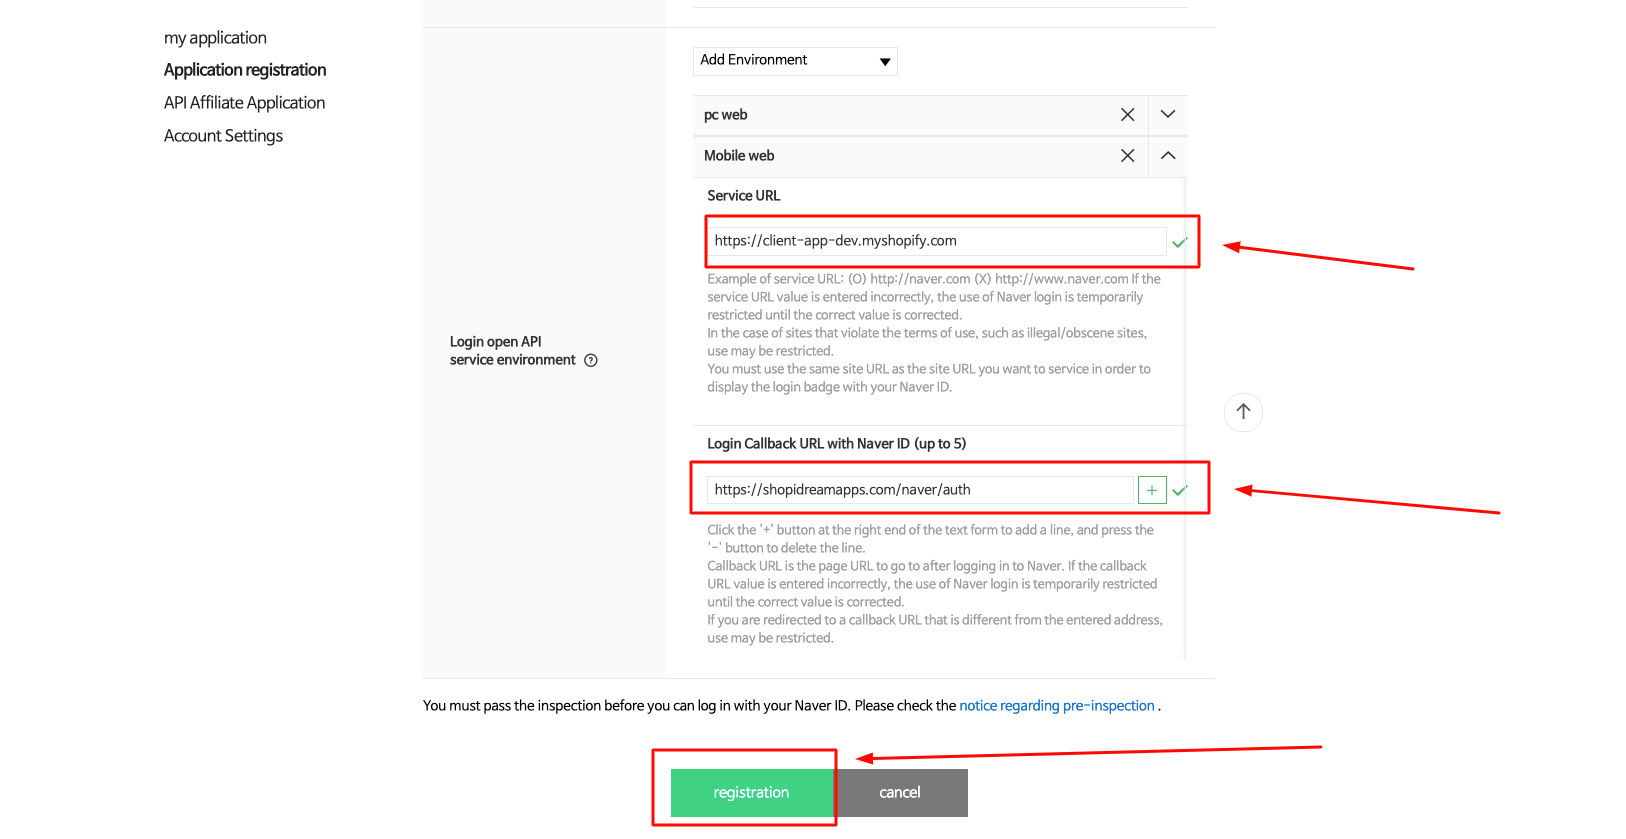
7
Configure Mobile Web with the same URLs as PC Web, then click Register.
8
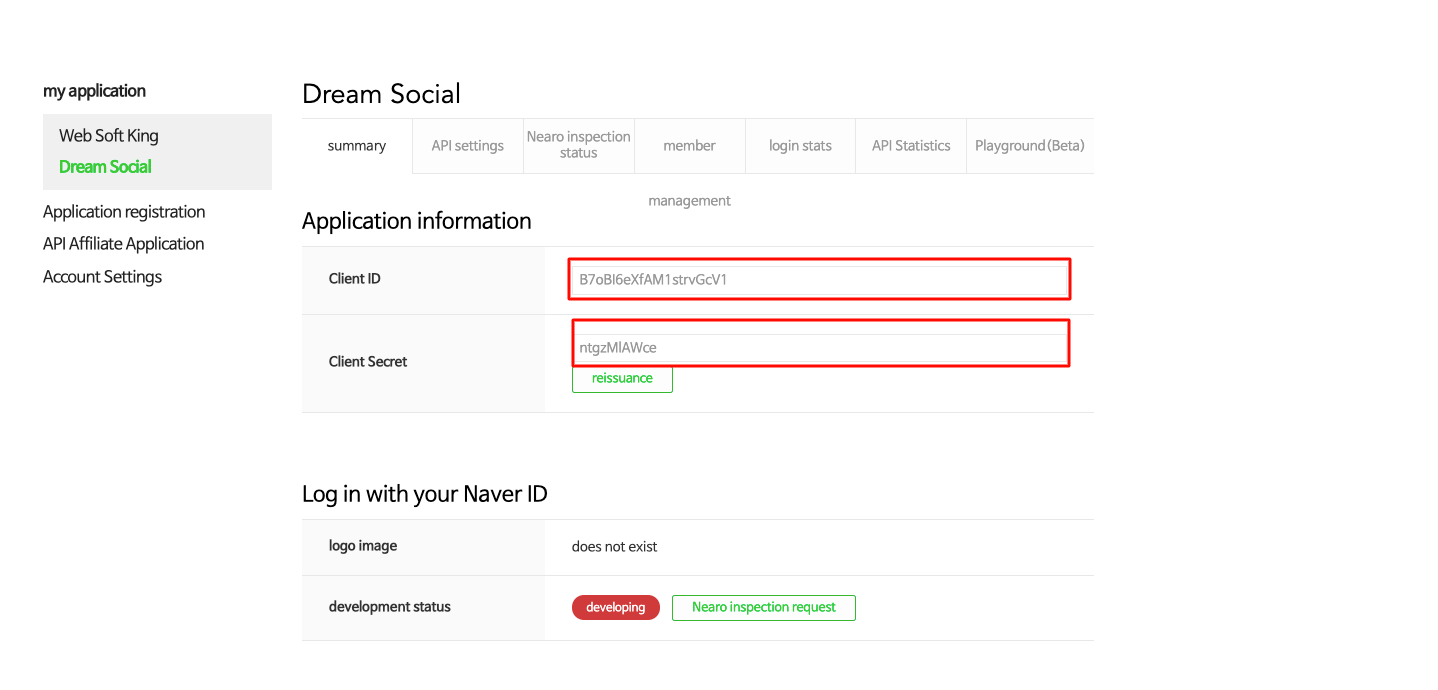
View the registration complete page.
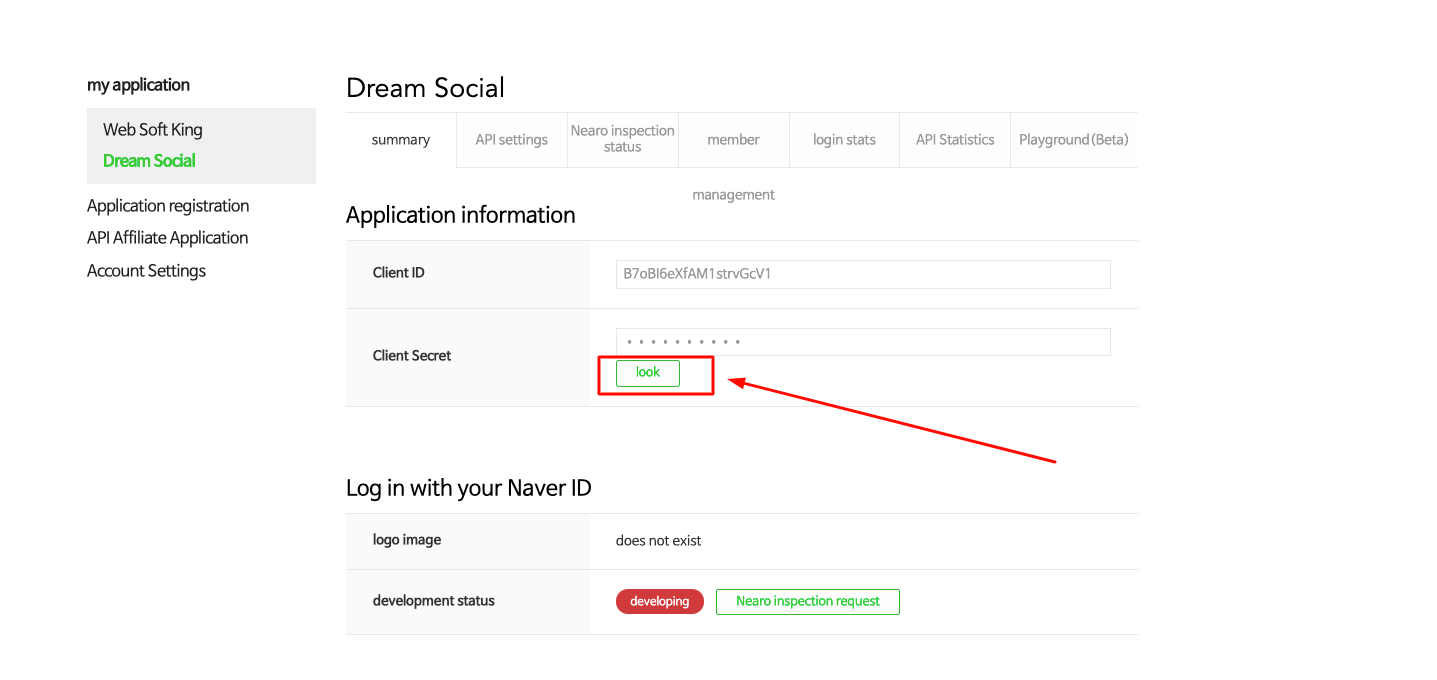
9
Copy your Client ID and Client Secret.
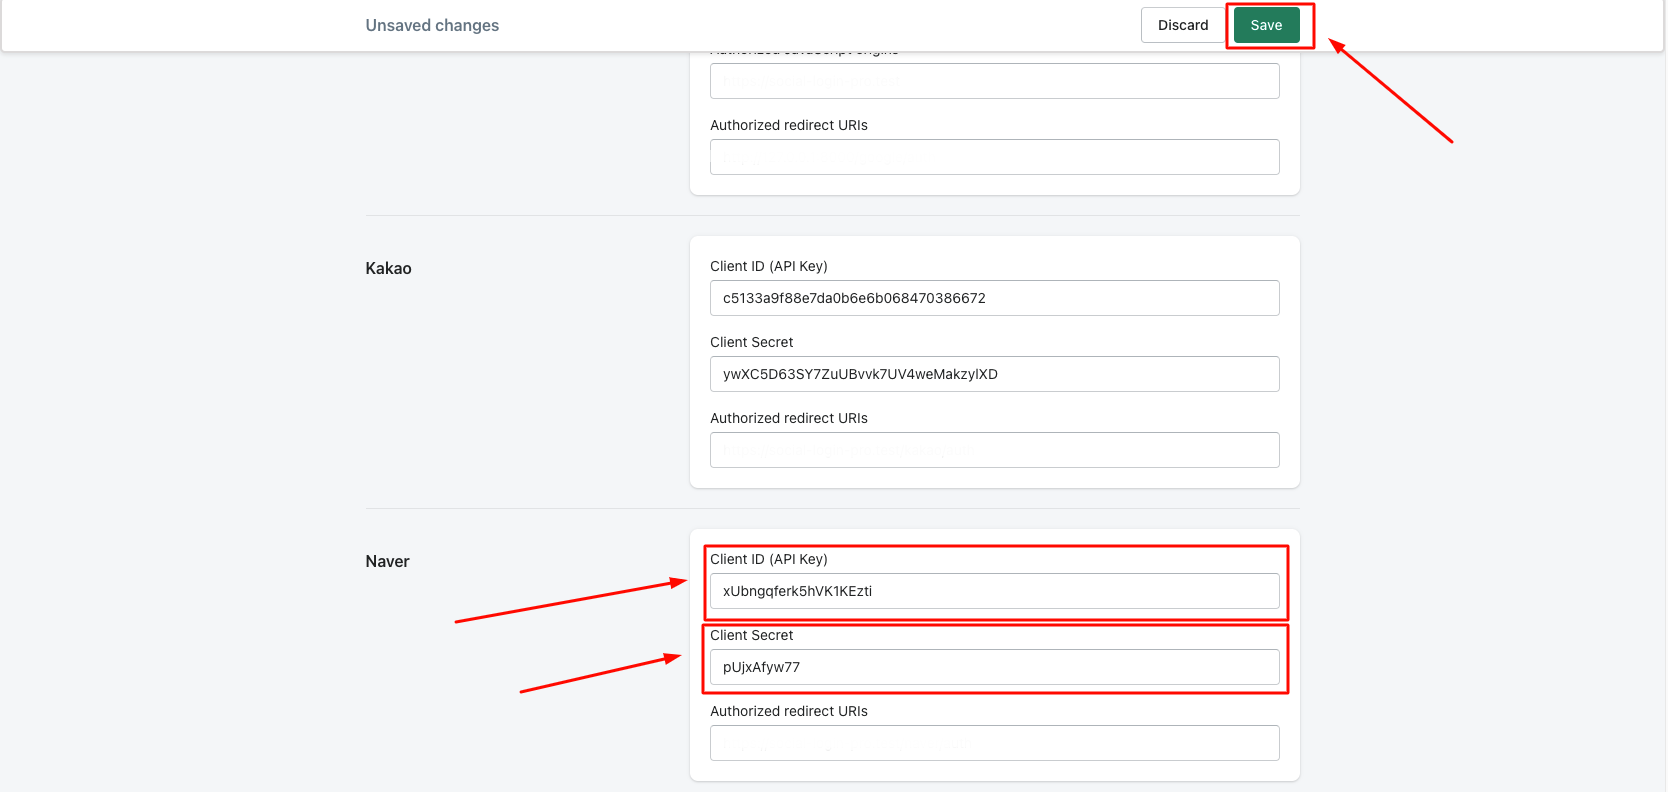
10
Paste the Client ID and Client Secret into Dream Social Login → API Keys → Naver.
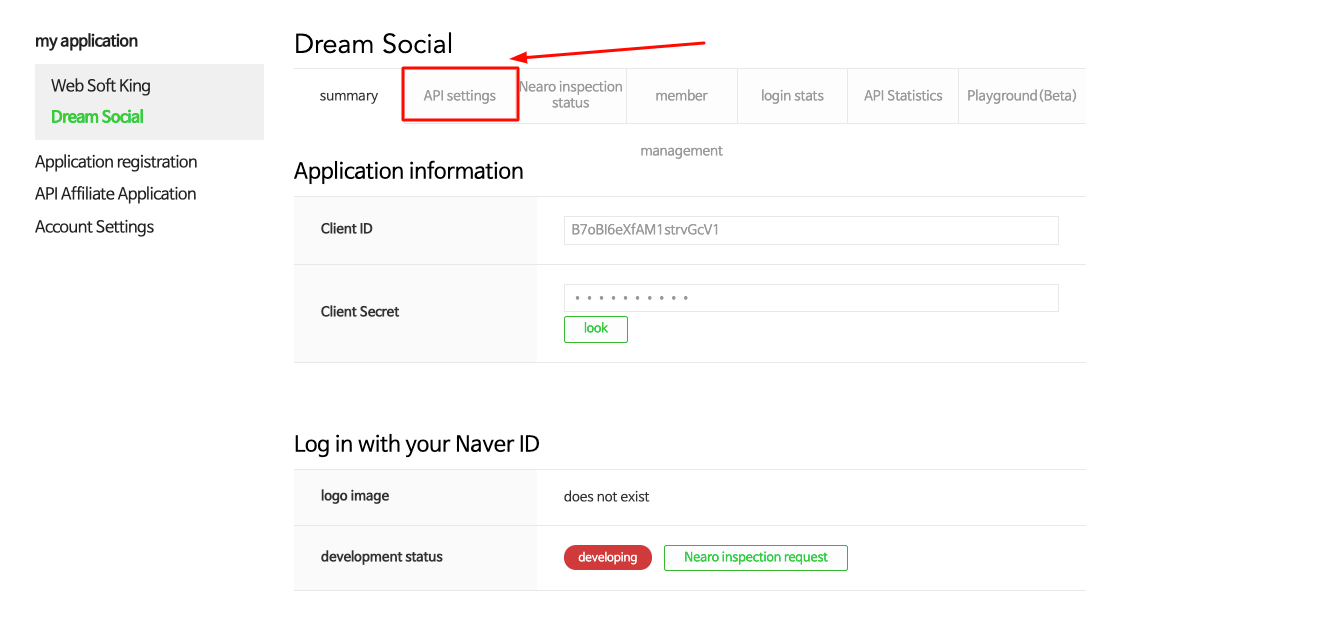
11
Go to App Settings → API Settings.
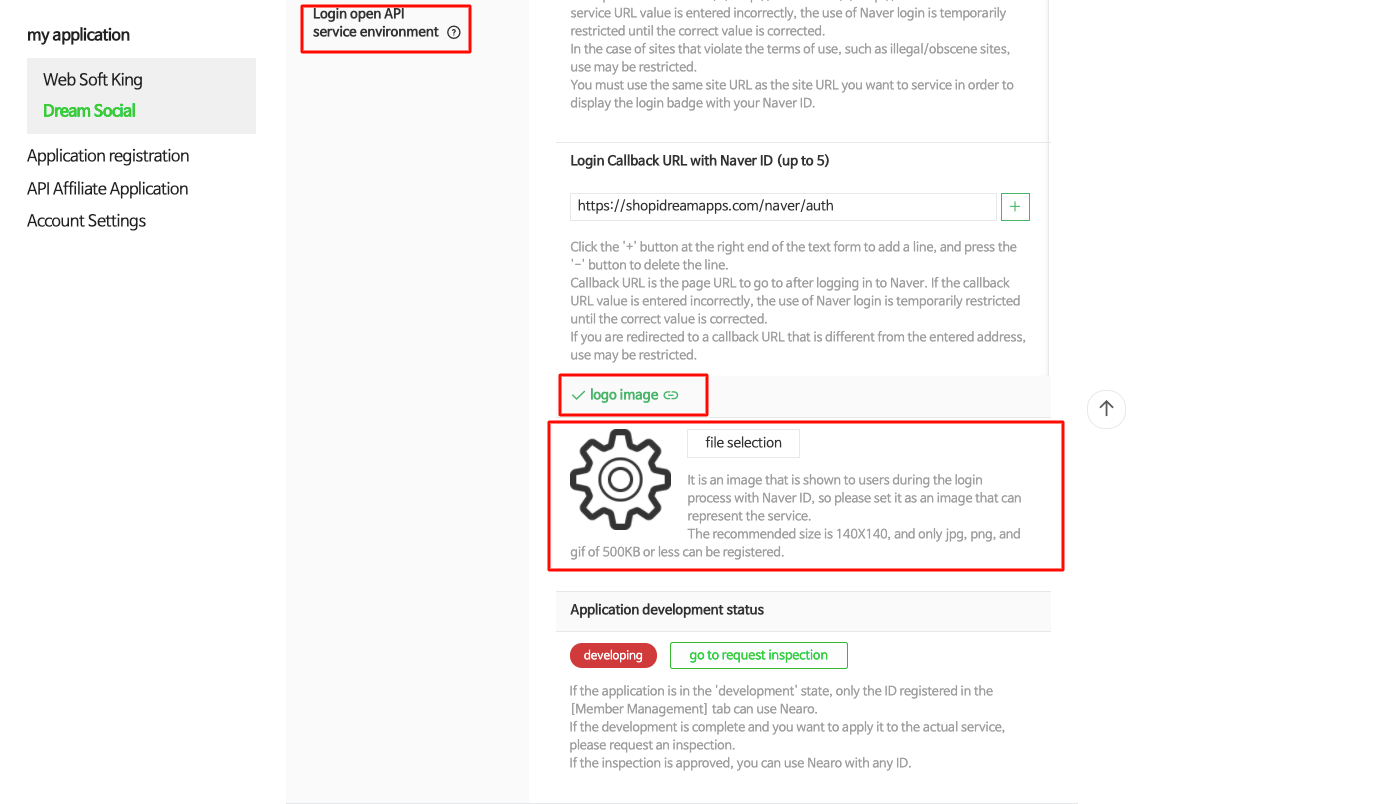
12
Upload your logo image in the Login Open API Service Environment section.
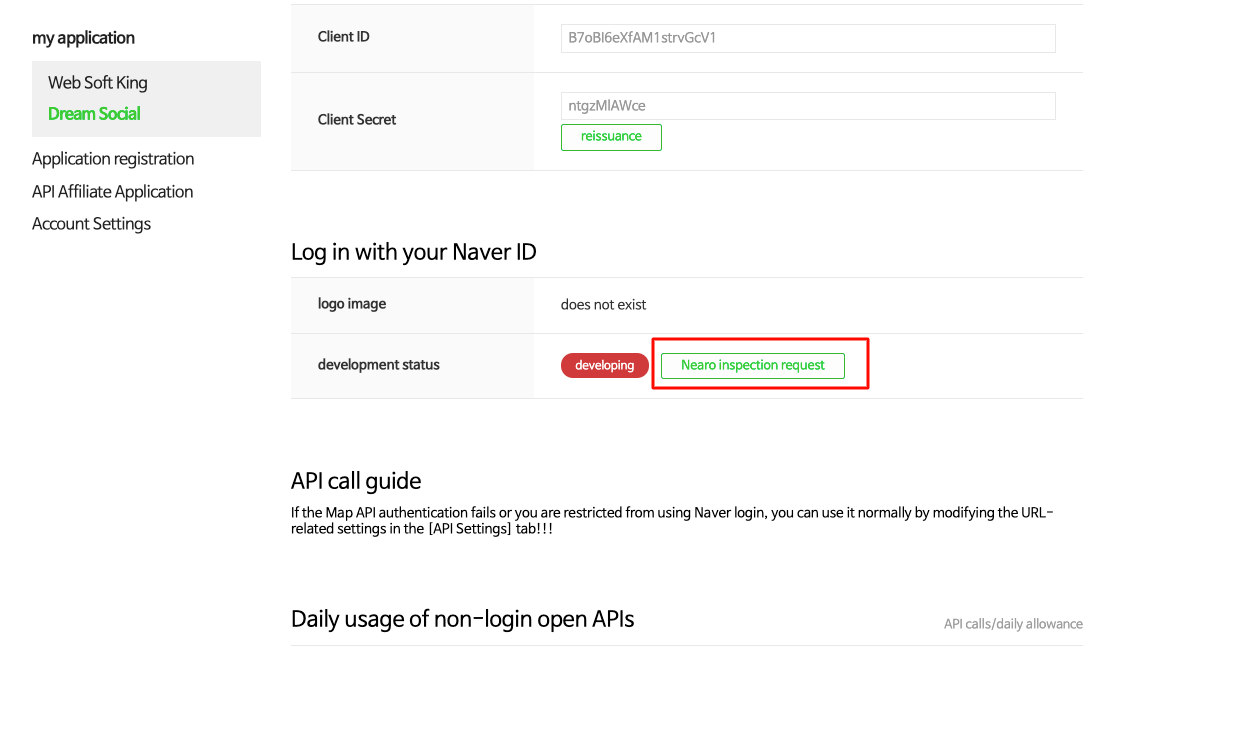
13
Submit the Naver Login review request.
My Application → Overview → Development Status → Click "Naver Login inspection request"
Verify the Integration
- Check that the Naver button appears on your storefront login page
- Test login with a Naver ID to ensure it works correctly
- Verify the Naver login record appears in your Shopify customer list
FAQ
What if my application review is rejected?
Review the feedback from the Naver review team, supplement the requested materials, and resubmit.
My Callback URL is not working.
Make sure the URL is exactly https://shopidreamapps.com/naver/auth. No trailing spaces or slashes.